Getting started with E-Invoice
If your business is applying for an electronic invoice for the first time or switching from traditional invoices to electronic ones, you’ll need to apply to your local tax bureau. QUEUE POS users can easily complete this process with our assistance. Simply follow the steps below, and you can start issuing electronic invoices by QUEUE POS!
Step 1: Provide Information for the Application
Section titled “Step 1: Provide Information for the Application”To streamline the application process, QUEUE POS will help you prepare the necessary documents. Please submit the following information through our official LINE:
- Tax ID number:
- Name of contact person:
- Telephone number:
- Postal address (for tax bureau records):
- Email address (the tax bureau will send notification to this email):
- Documents postal address (QUEUE POS will send the application to this address):
Step 2: Stamp the Documents
Section titled “Step 2: Stamp the Documents”After receiving your application information, QUEUE POS will post the paper application documents to your Documents postal address within 3 business days. Upon receipt, verify the package contains:
- Electronic Invoice Number Application Form
- Carrier ID Scanable Sample
- Electronic Invoice Commitment
- Thermal Paper Agreement
- Self-Inspection Form
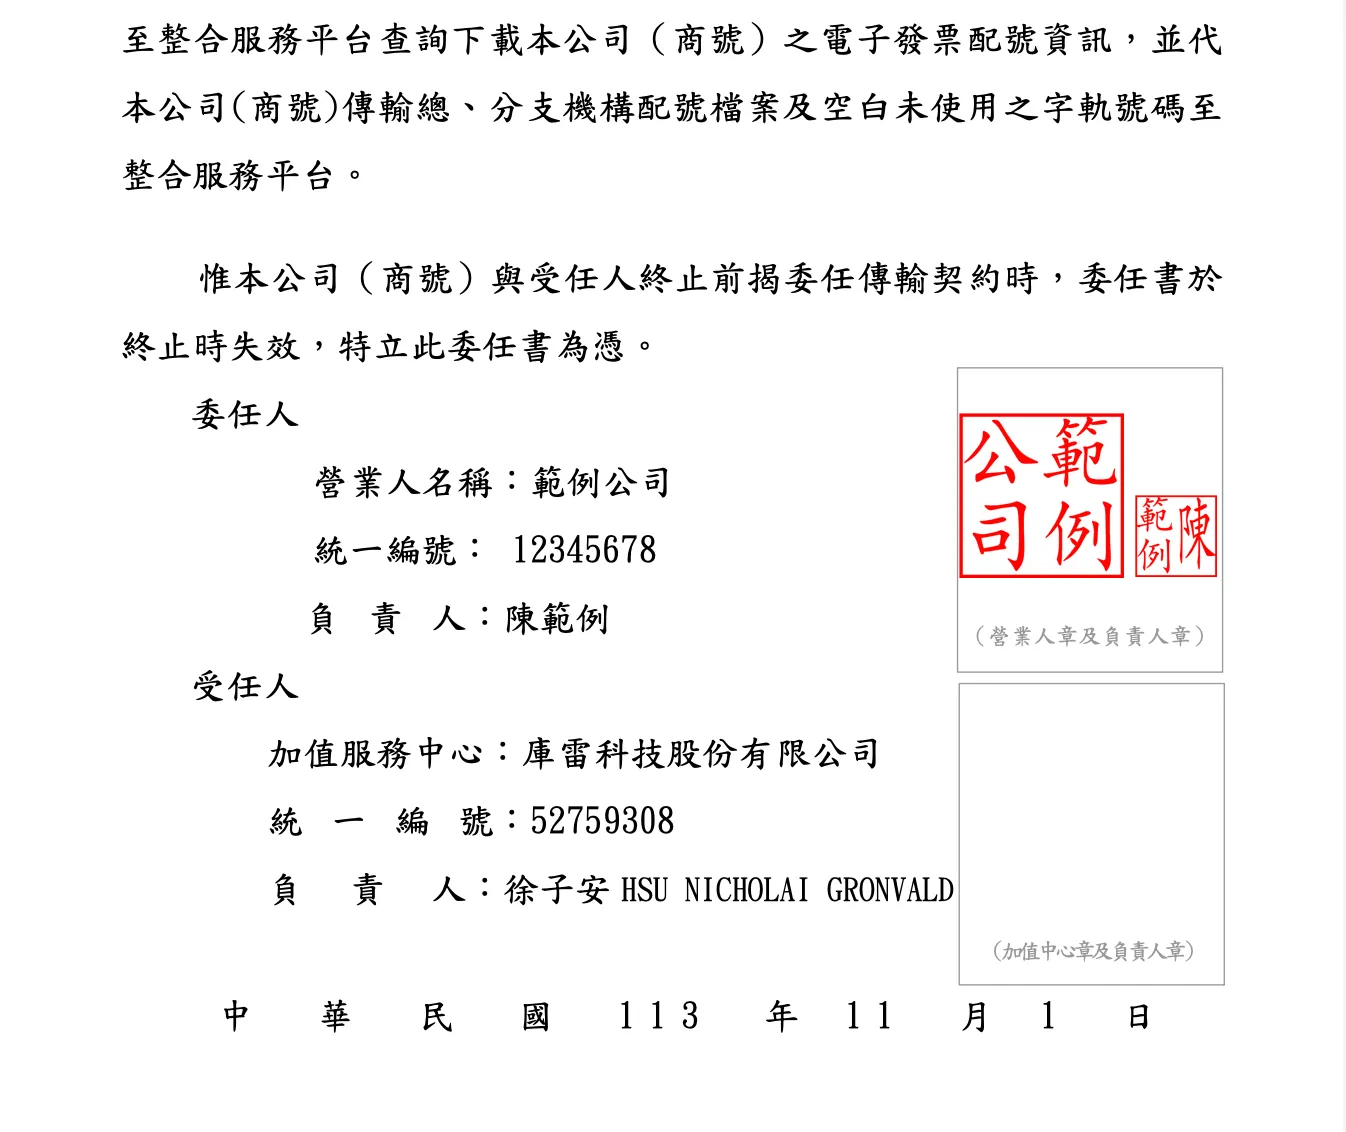
- Power of Attorney
- Invoice Sample
If everything is correct, please stamp the documents in 5 designated places with both your company seal and the responsible person’s stamp. Reviewing a Stamping Example.
Step 3: Submit the Application
Section titled “Step 3: Submit the Application”After stamping, please submit all the documents in Step 2 to your local tax bureau. If you cannot submit the documents in person, you may post it to the business tax window of your local tax bureau.
Step 4: Create an E-Invoice Platform Account
Section titled “Step 4: Create an E-Invoice Platform Account”After your application is approved, you’ll receive an email from the “E-Invoice Platform” for creating a business account. Follow the email instructions to set up your login.
Step 5: Set Up Email Configuration and Take the E-Invoice Track Number
Section titled “Step 5: Set Up Email Configuration and Take the E-Invoice Track Number”-
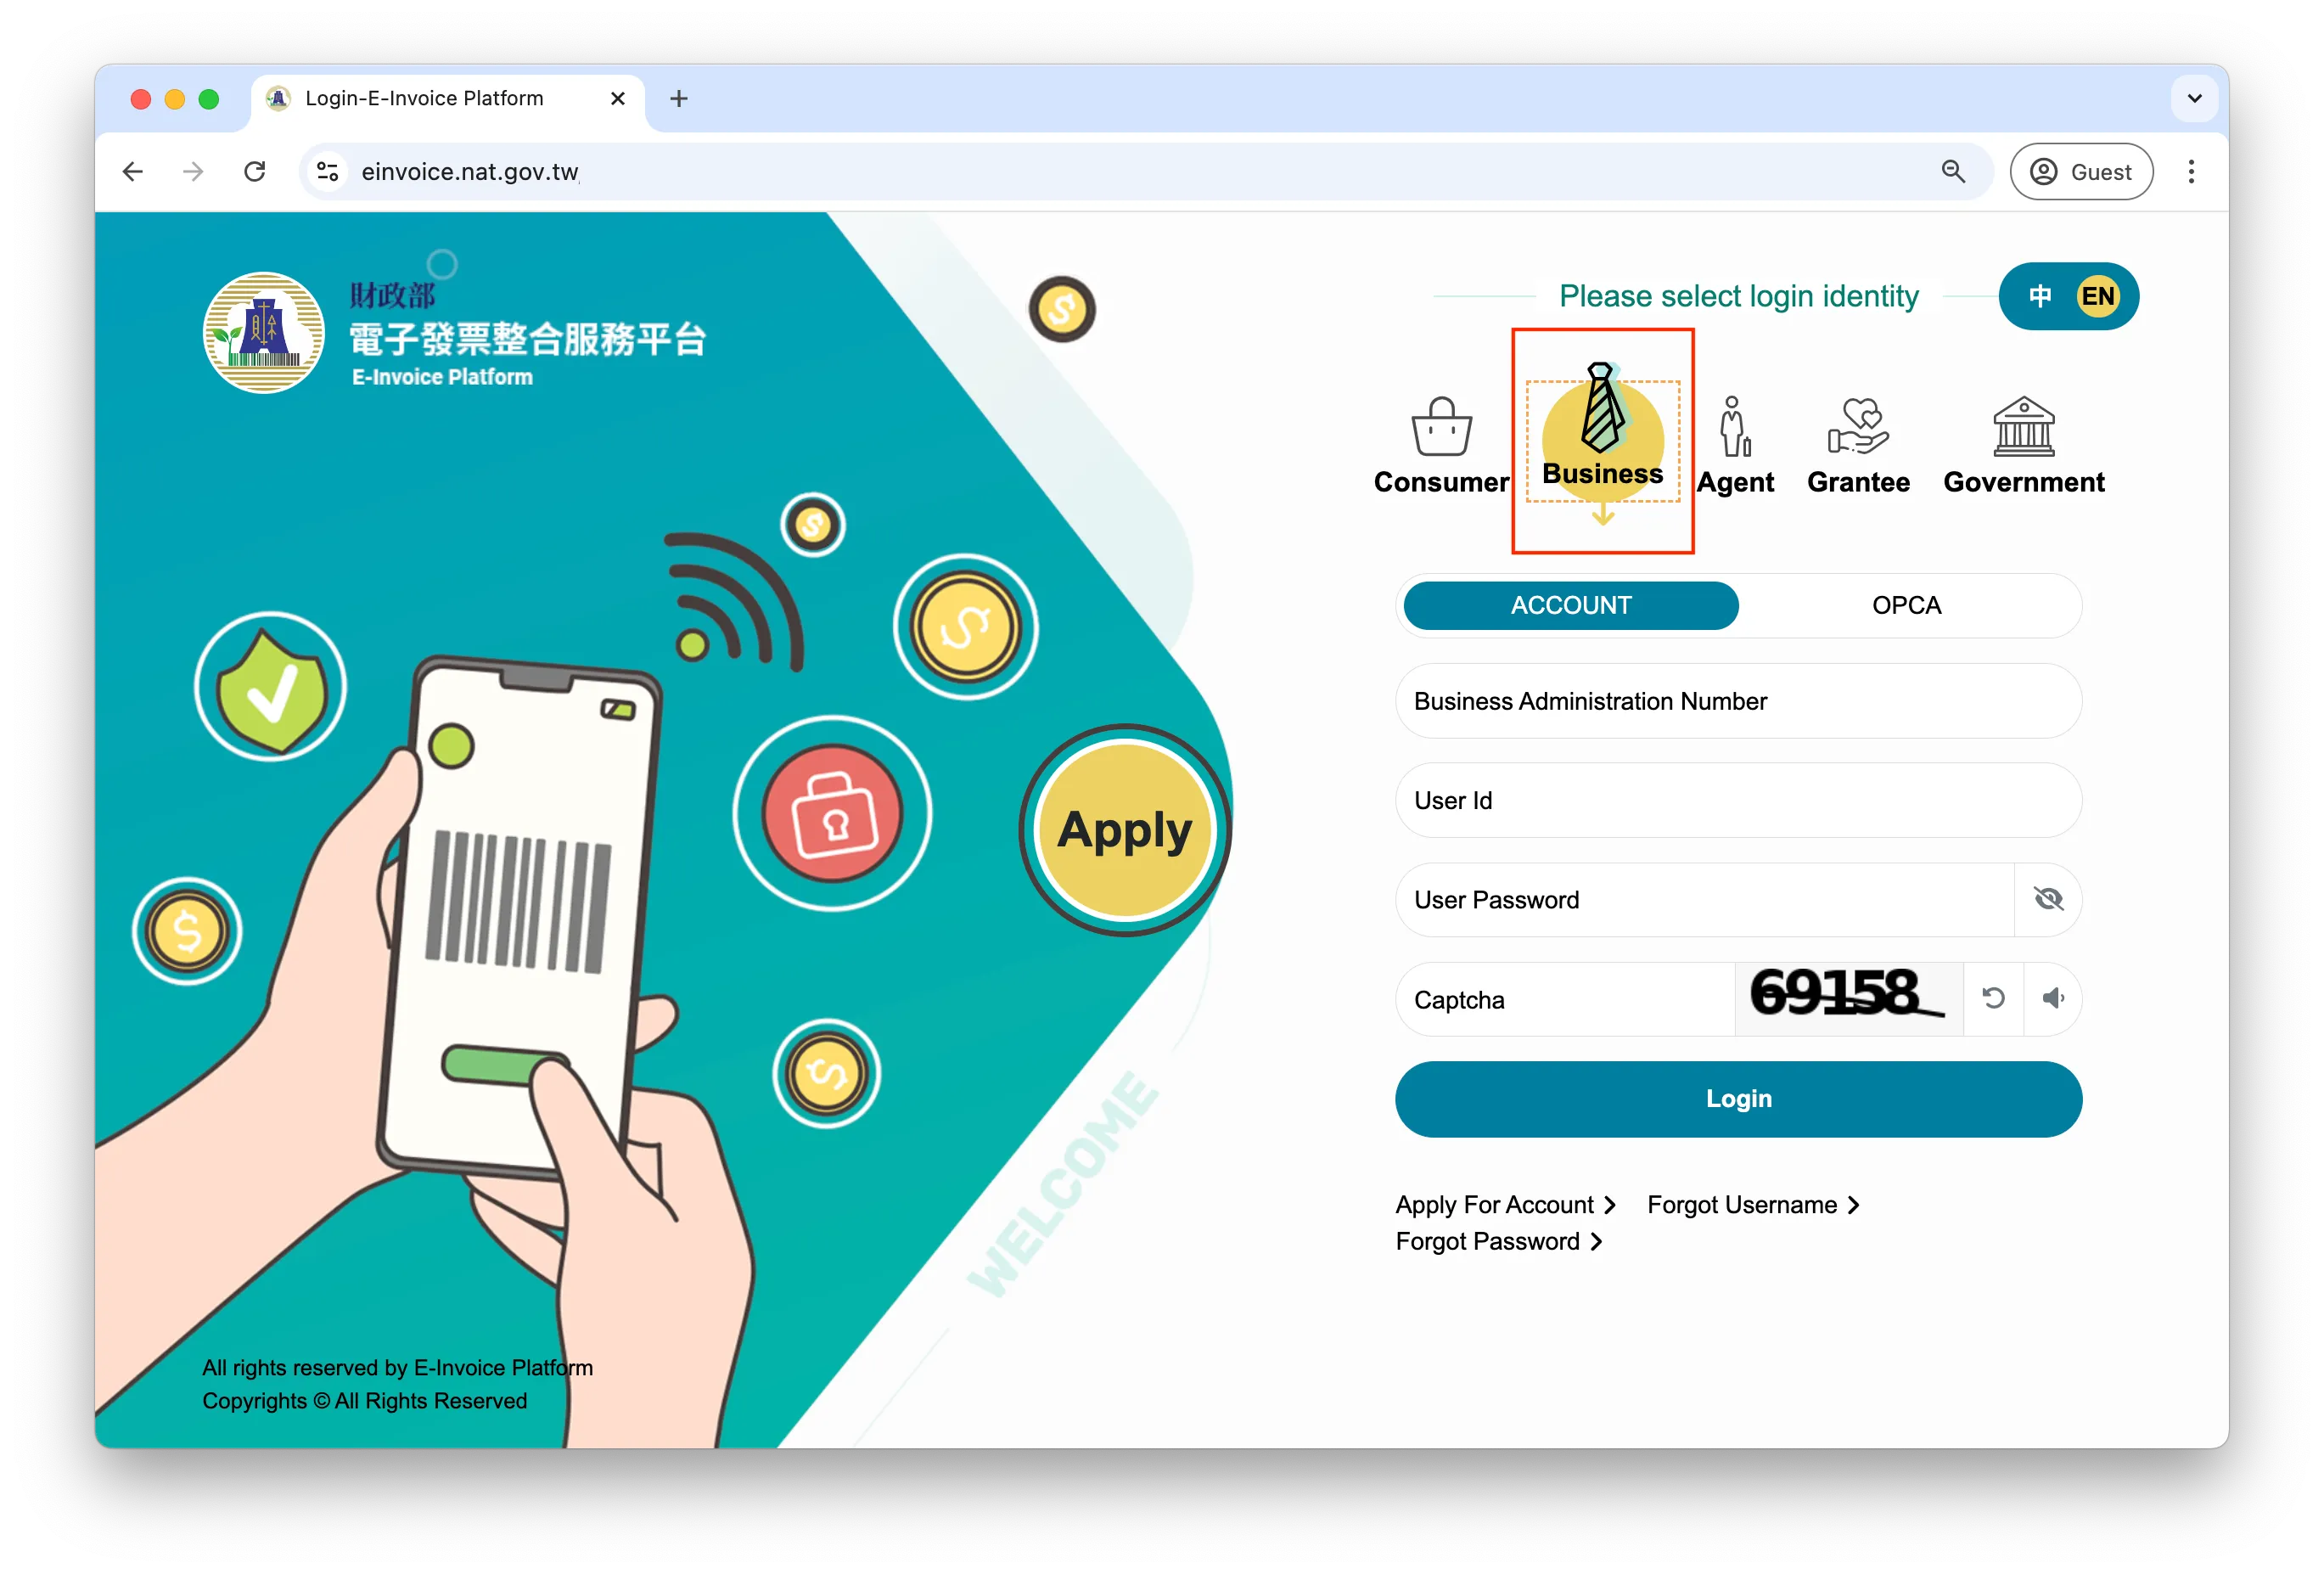
After successfully creating your account and password, please log in to the E-Invoice platform as a Business Operator.
-
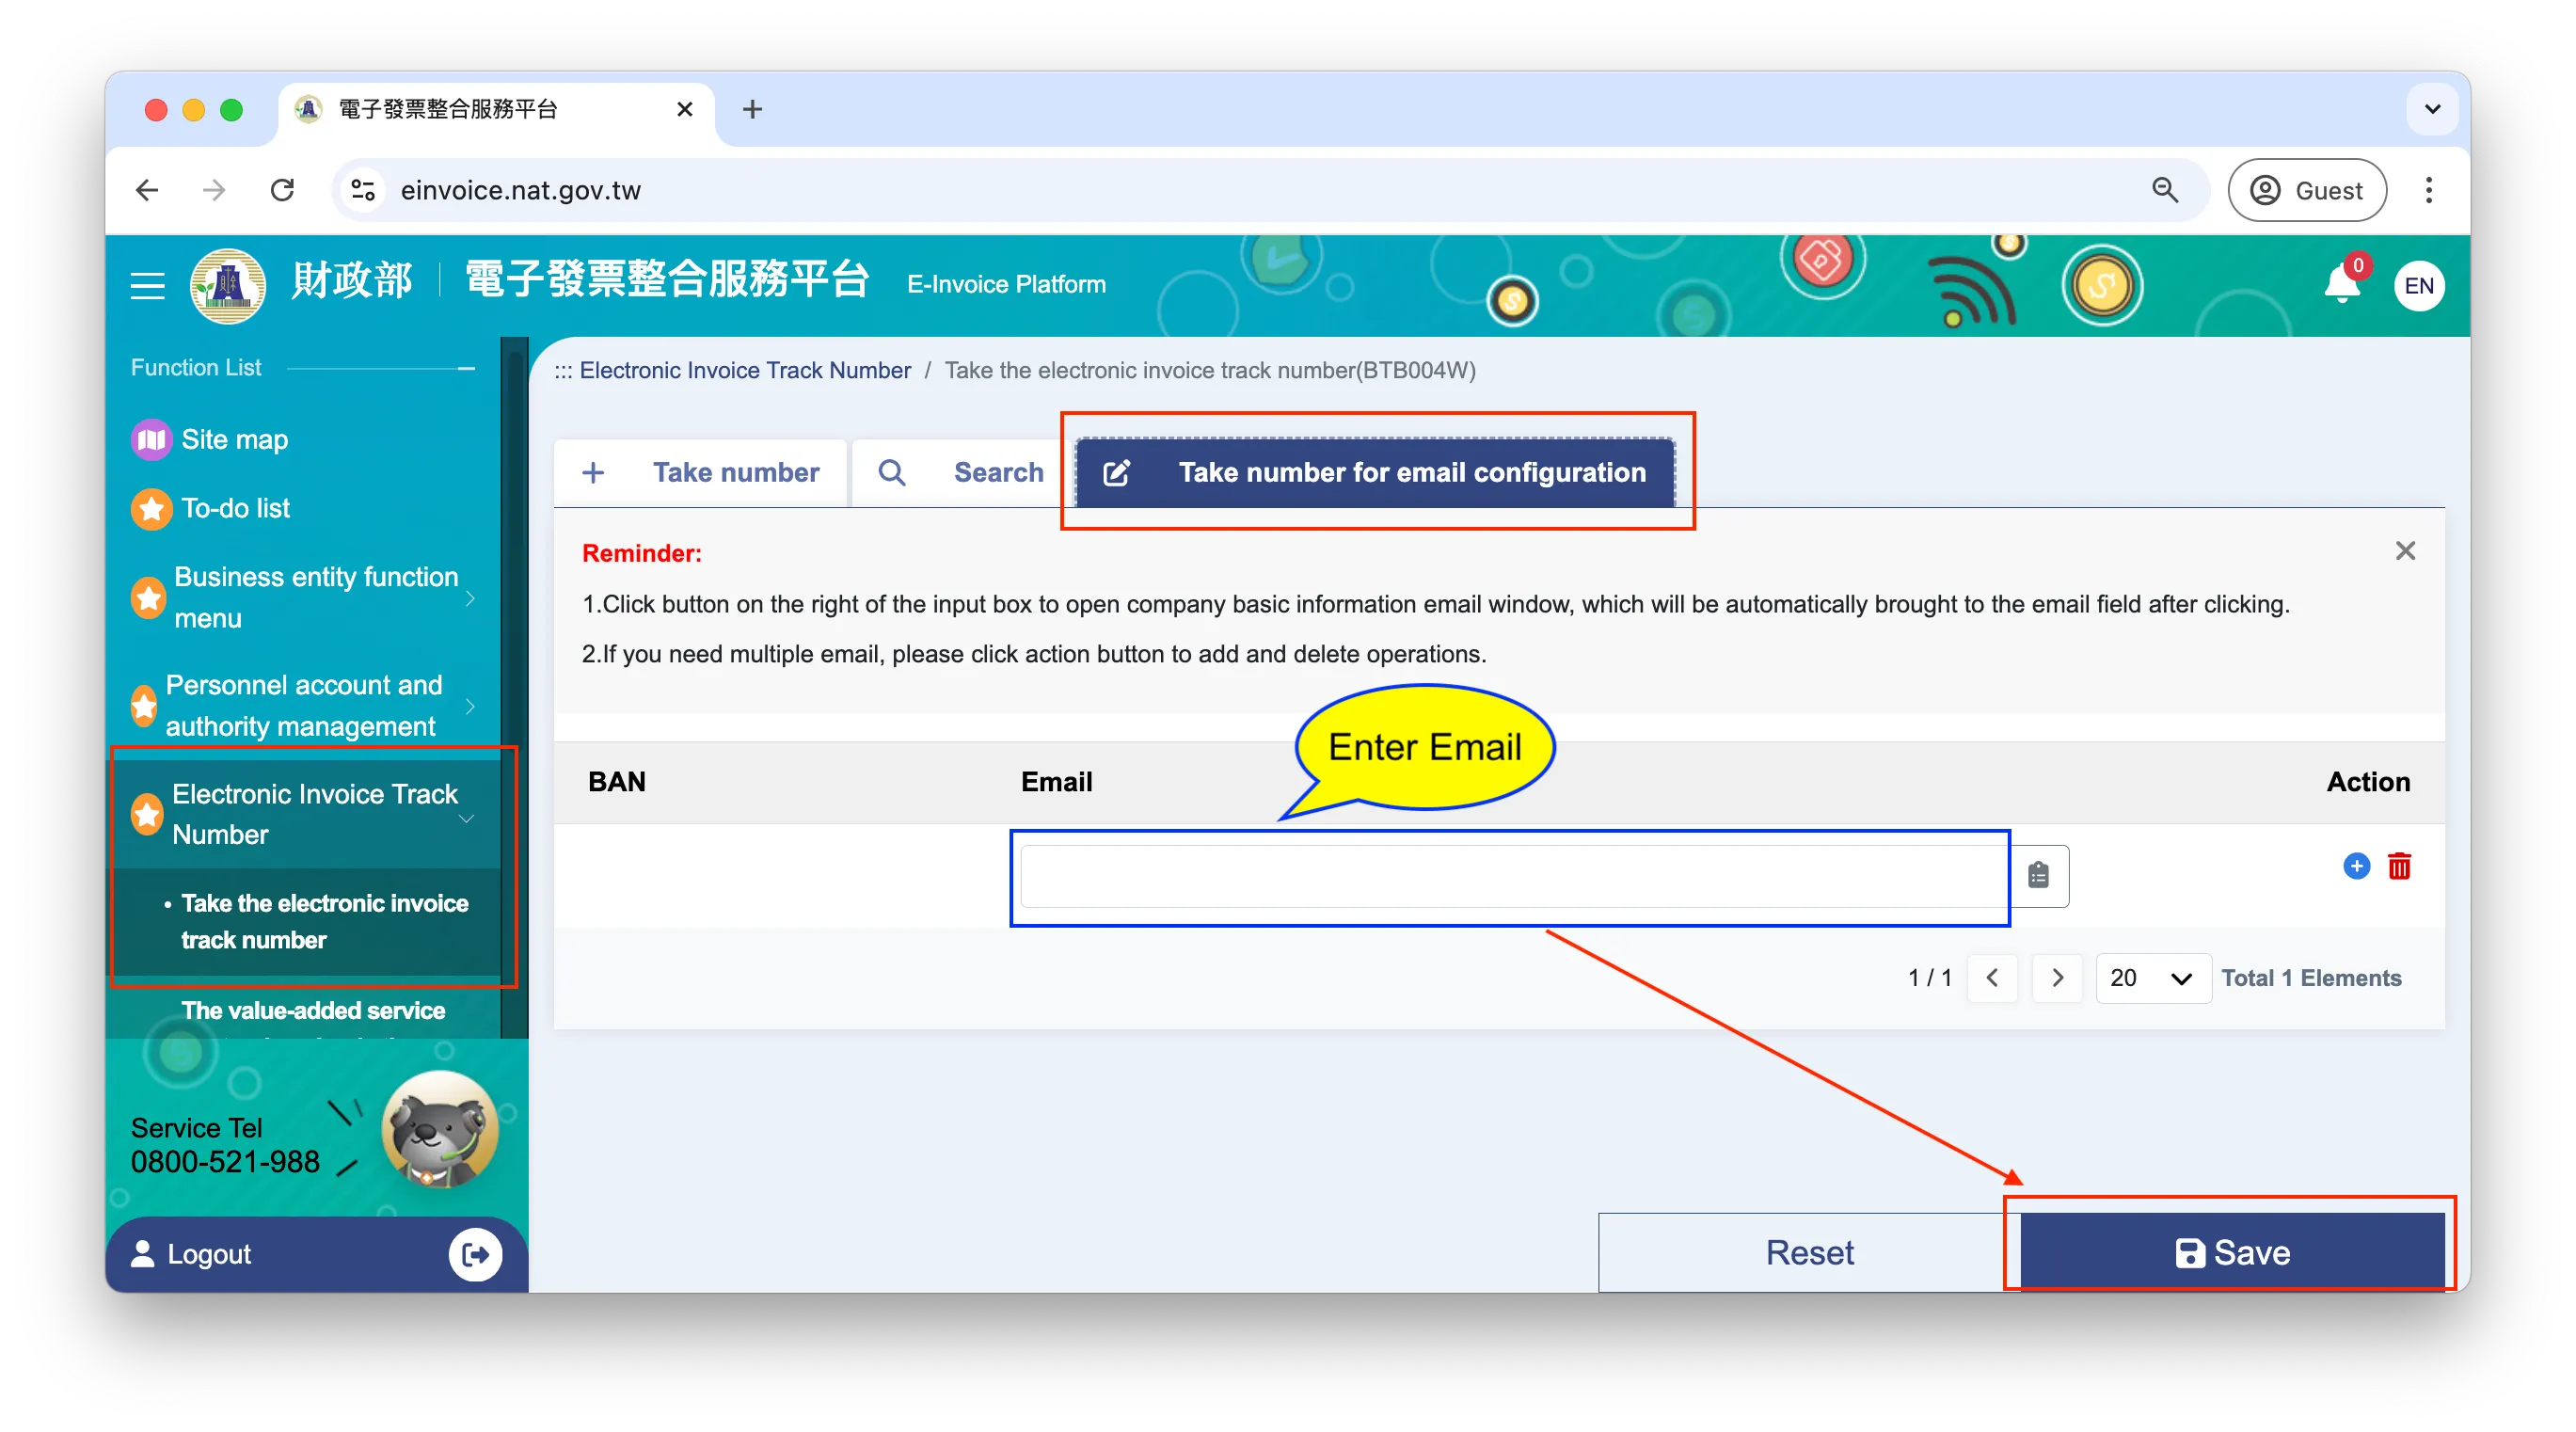
Navigate to Electronic Invoice Track Number > Take the electronic invoice track number and click on the Take number fro email configuration tab, enter your email address, and click Save.
-
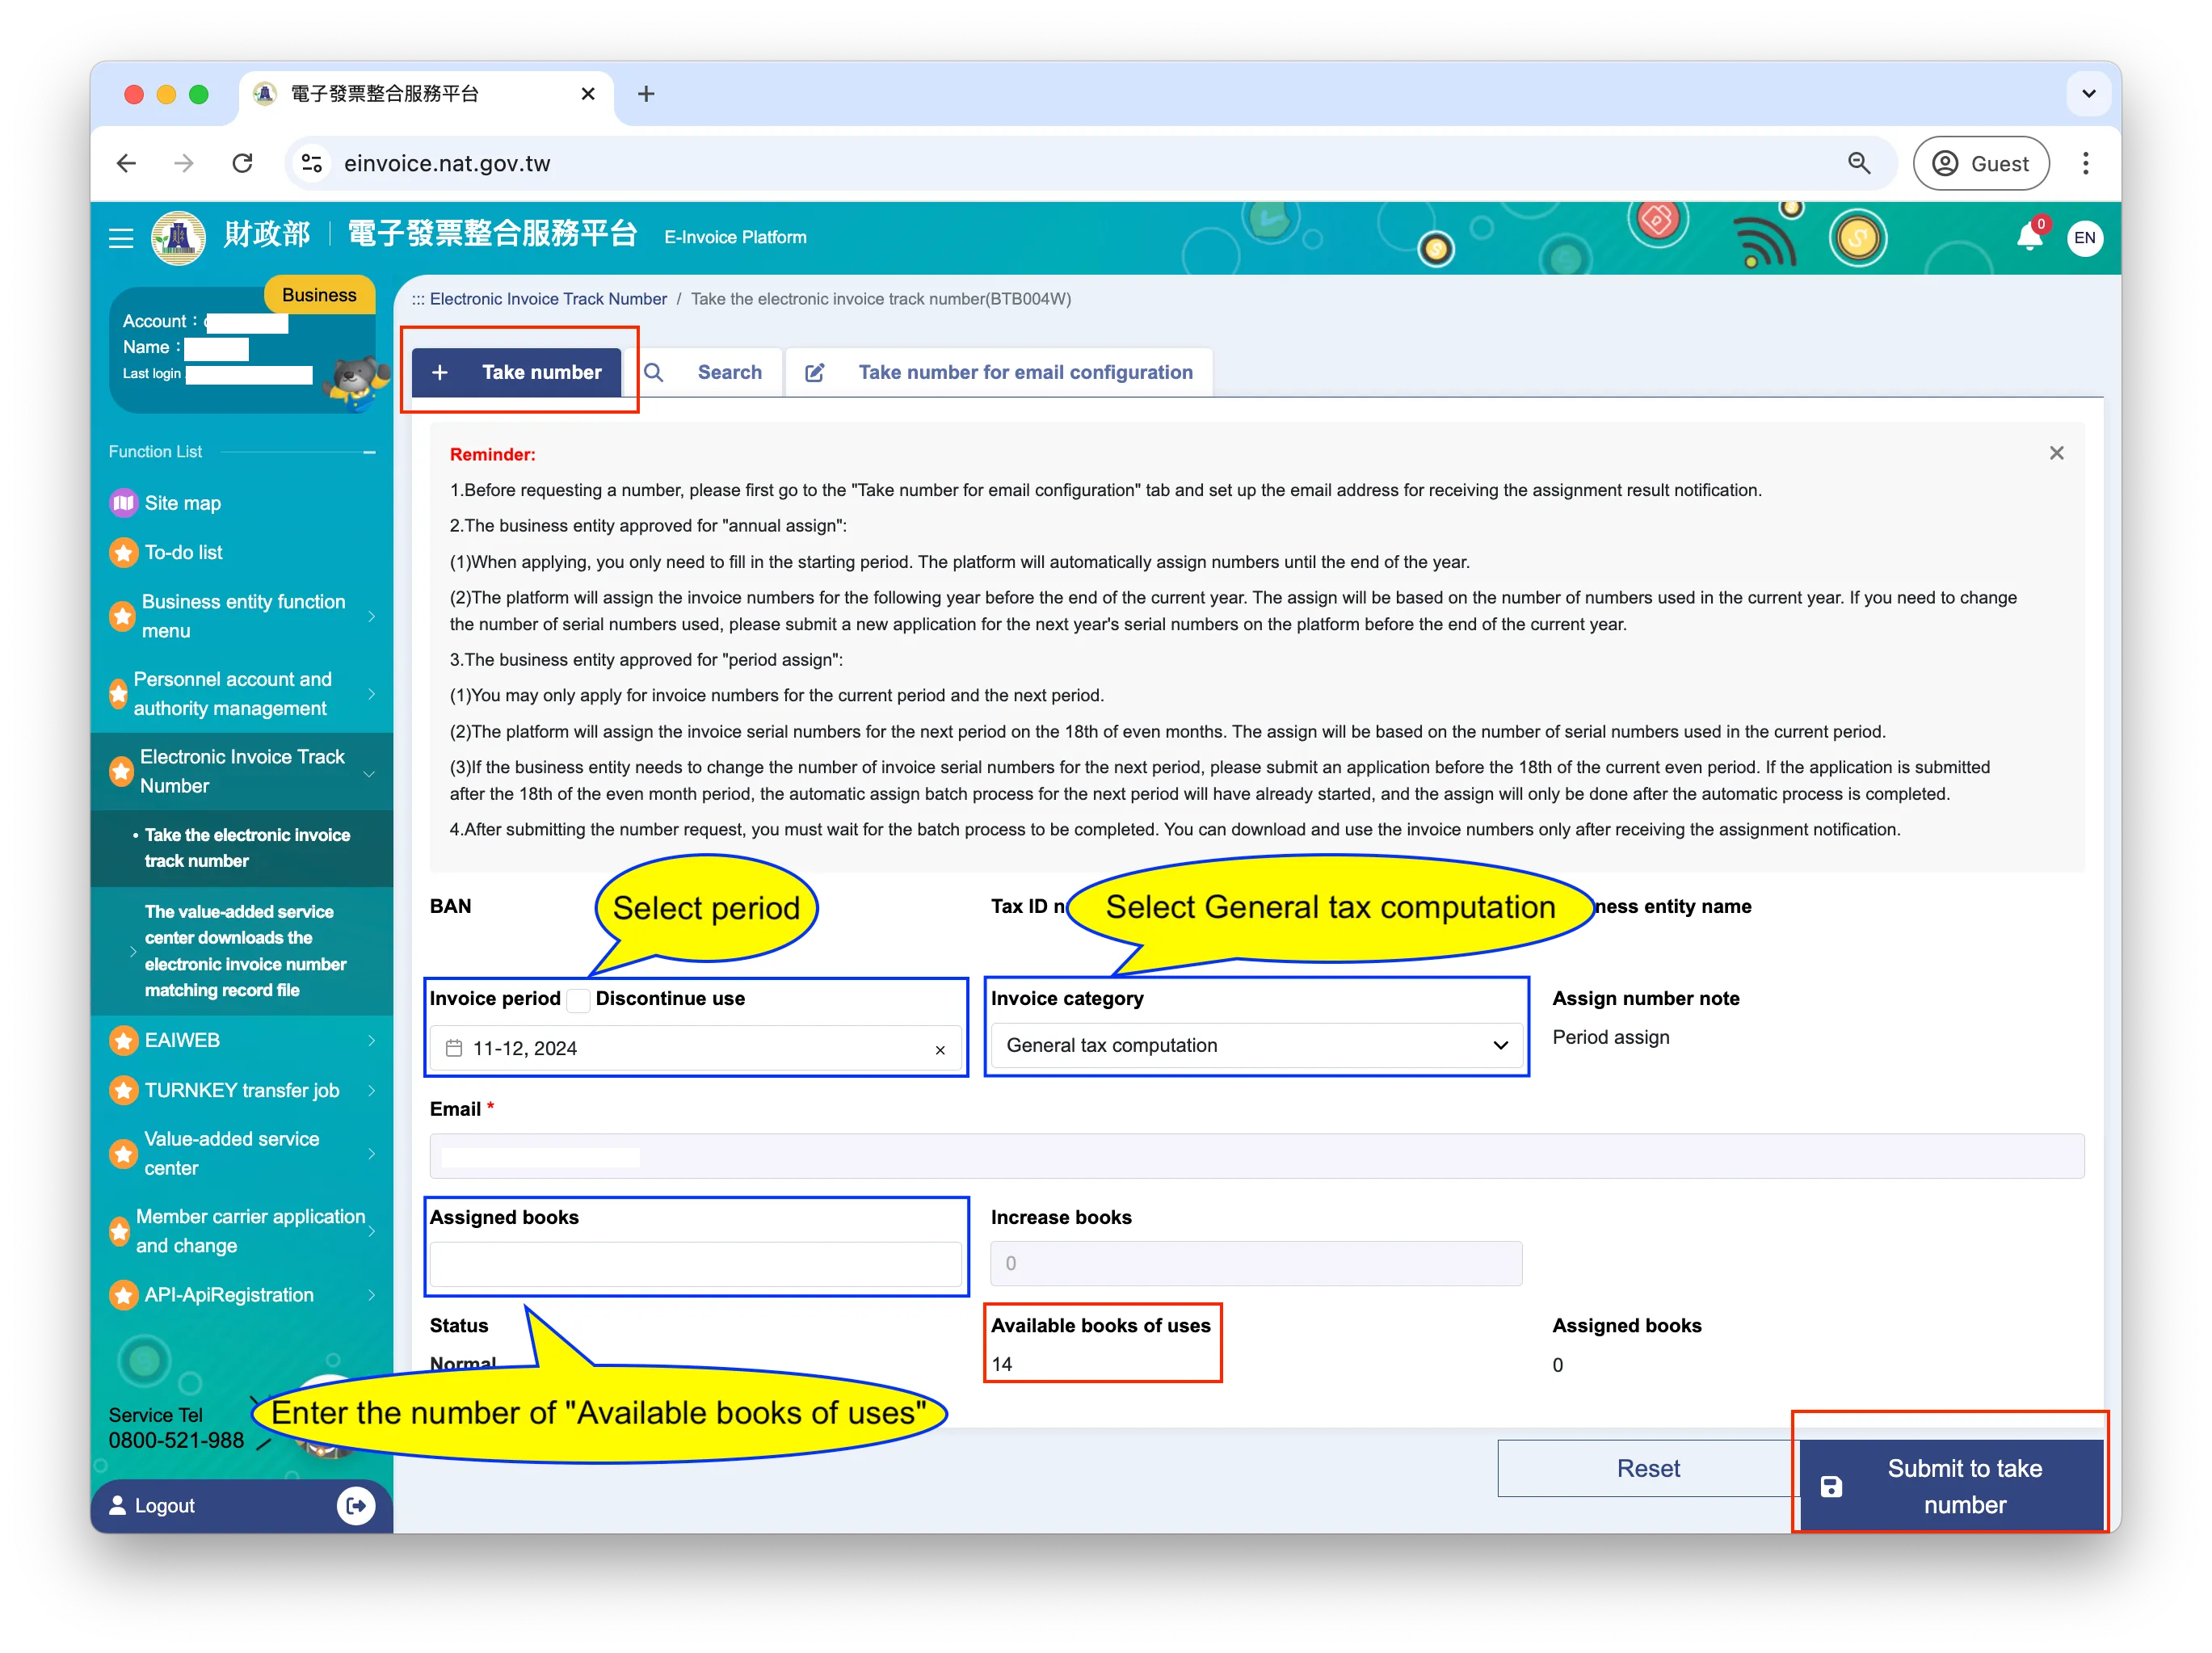
Switch back to the Take number tab and complete the following:
-
Invoice period: Select the desired period for invoice numbers (current or planned start date for e-invoices).
-
Invoice Category: Select General tax computation.
-
Increase books: It is recommended to directly enter the number of “Available books of uses” below to take all numbers (1 book = 50 invoices).
-
Click Submit the take number.
-
Step 6: Set up E-Invoice Seed Password
Section titled “Step 6: Set up E-Invoice Seed Password”-
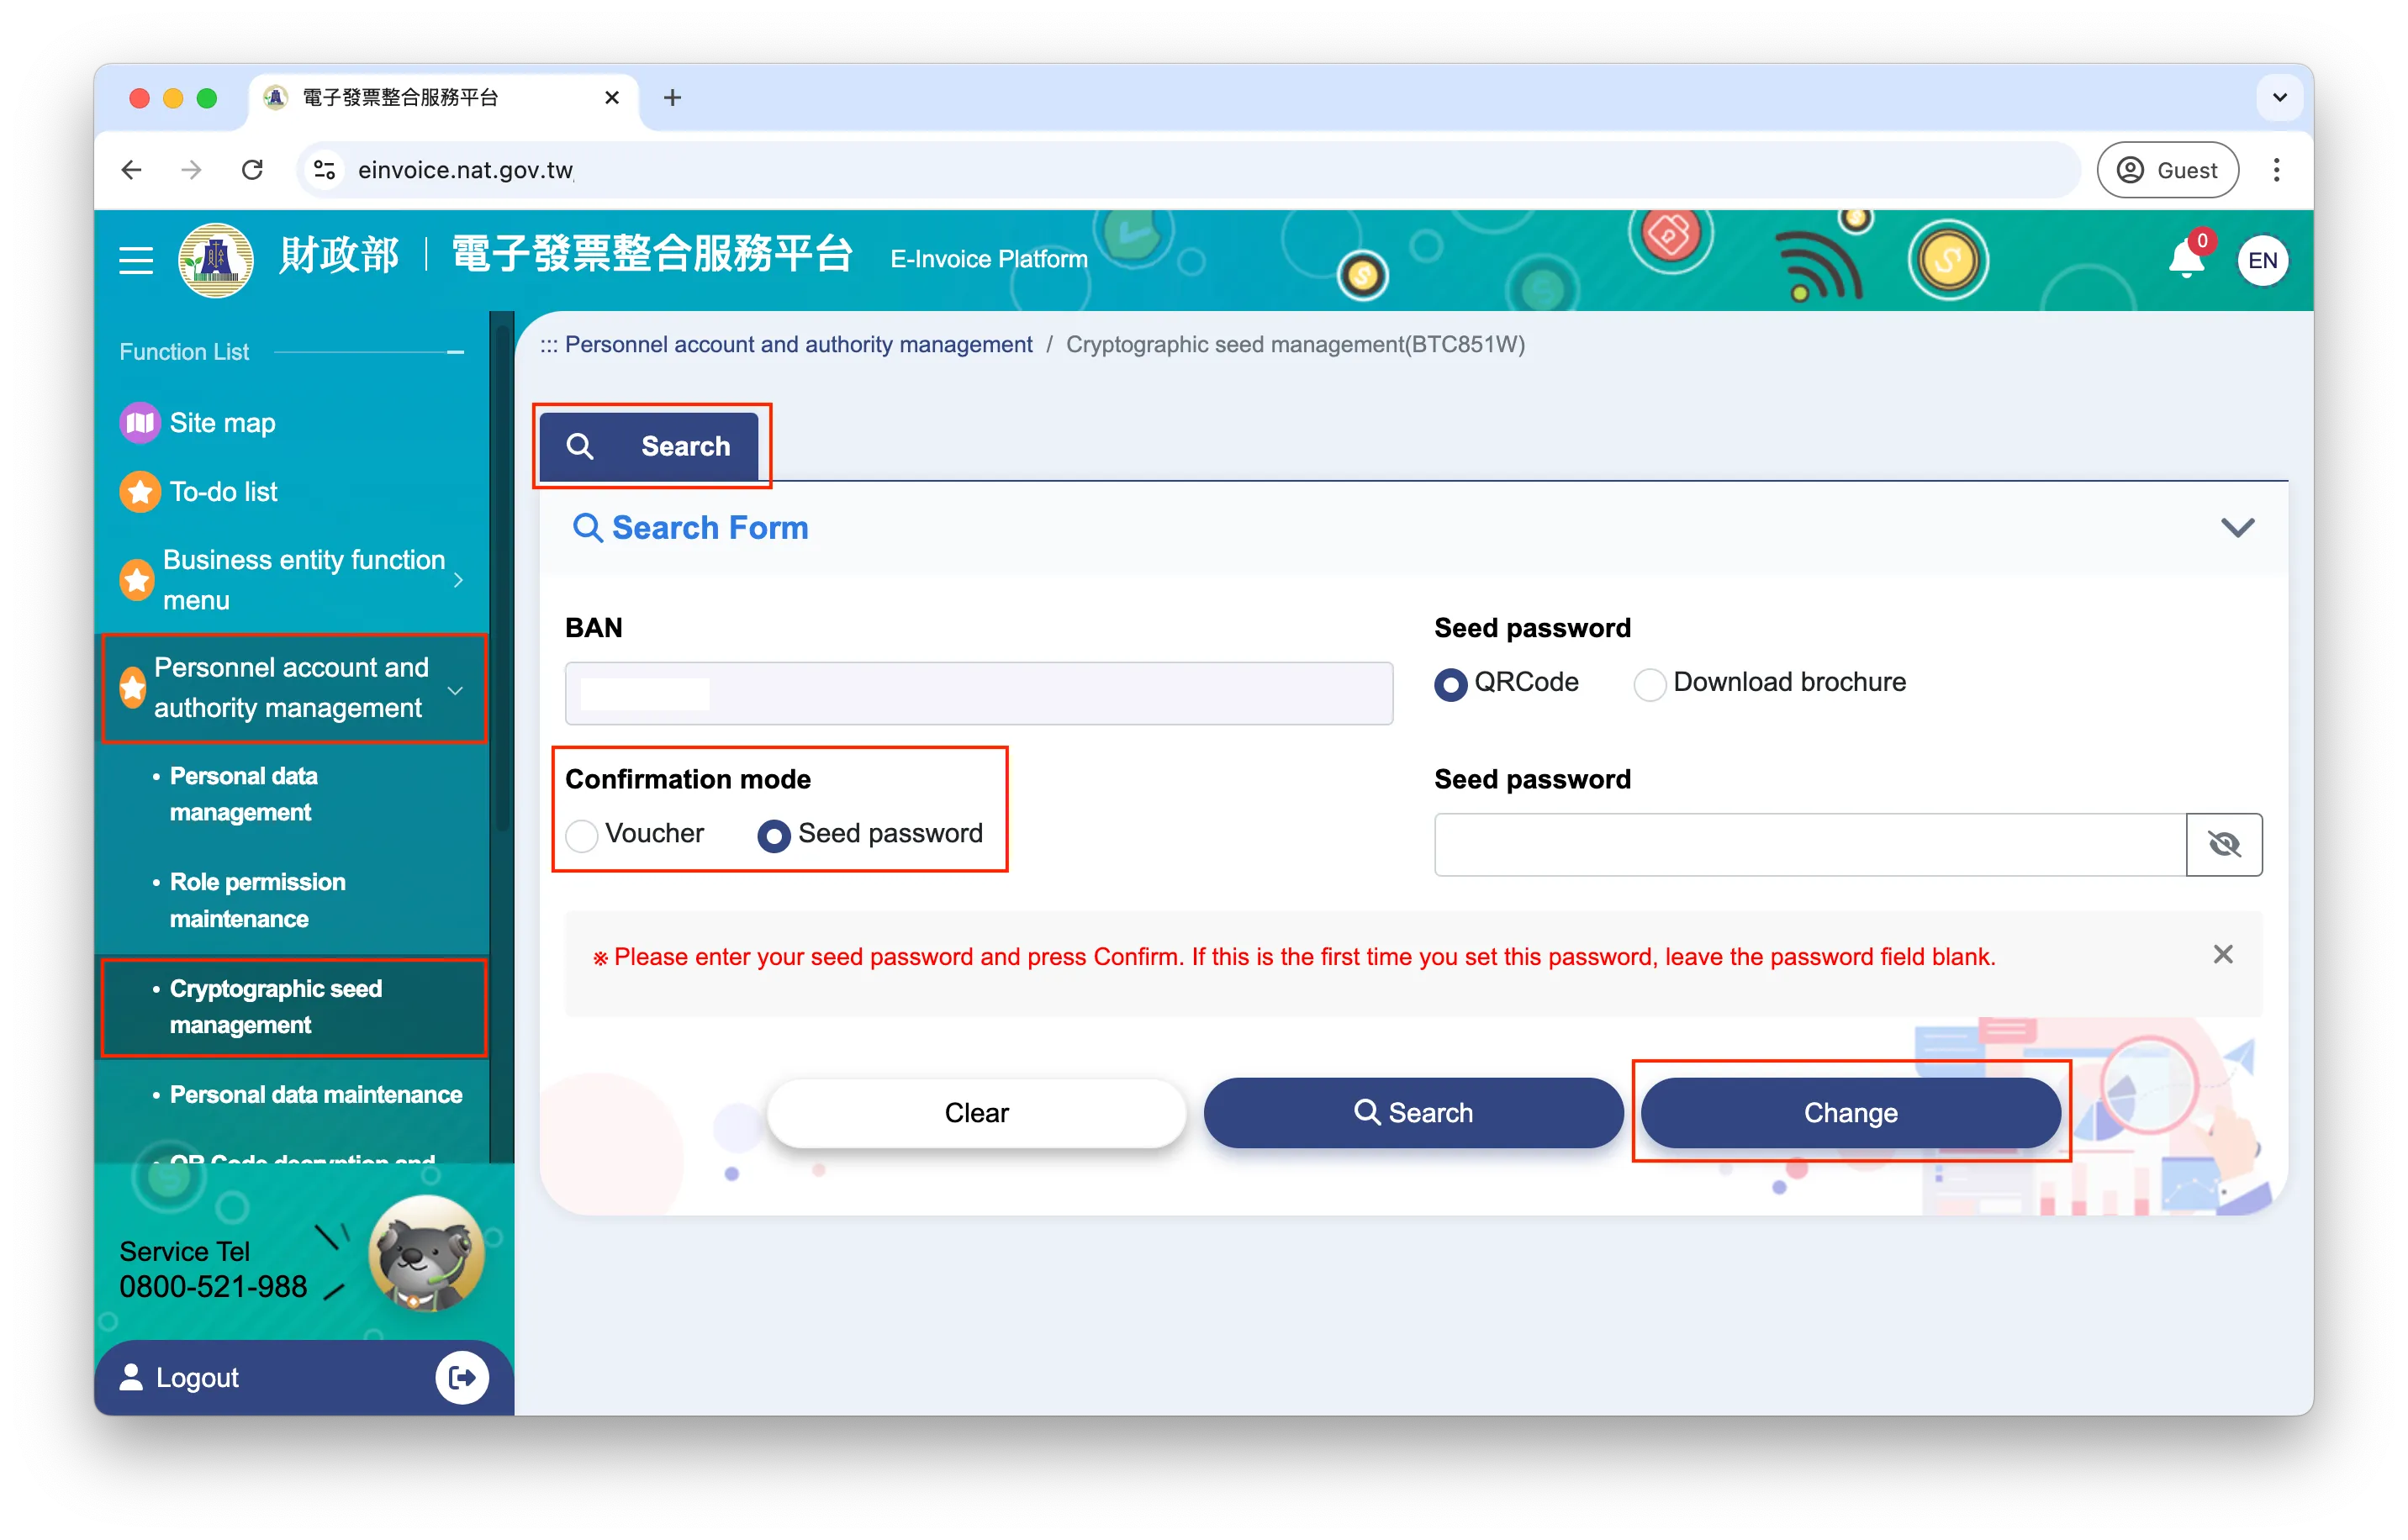
Navigate to Personnel account and authority management on the left-hand menu > Cryptographic seed management
- Confirmation mode: Select Seed password
- Click Change
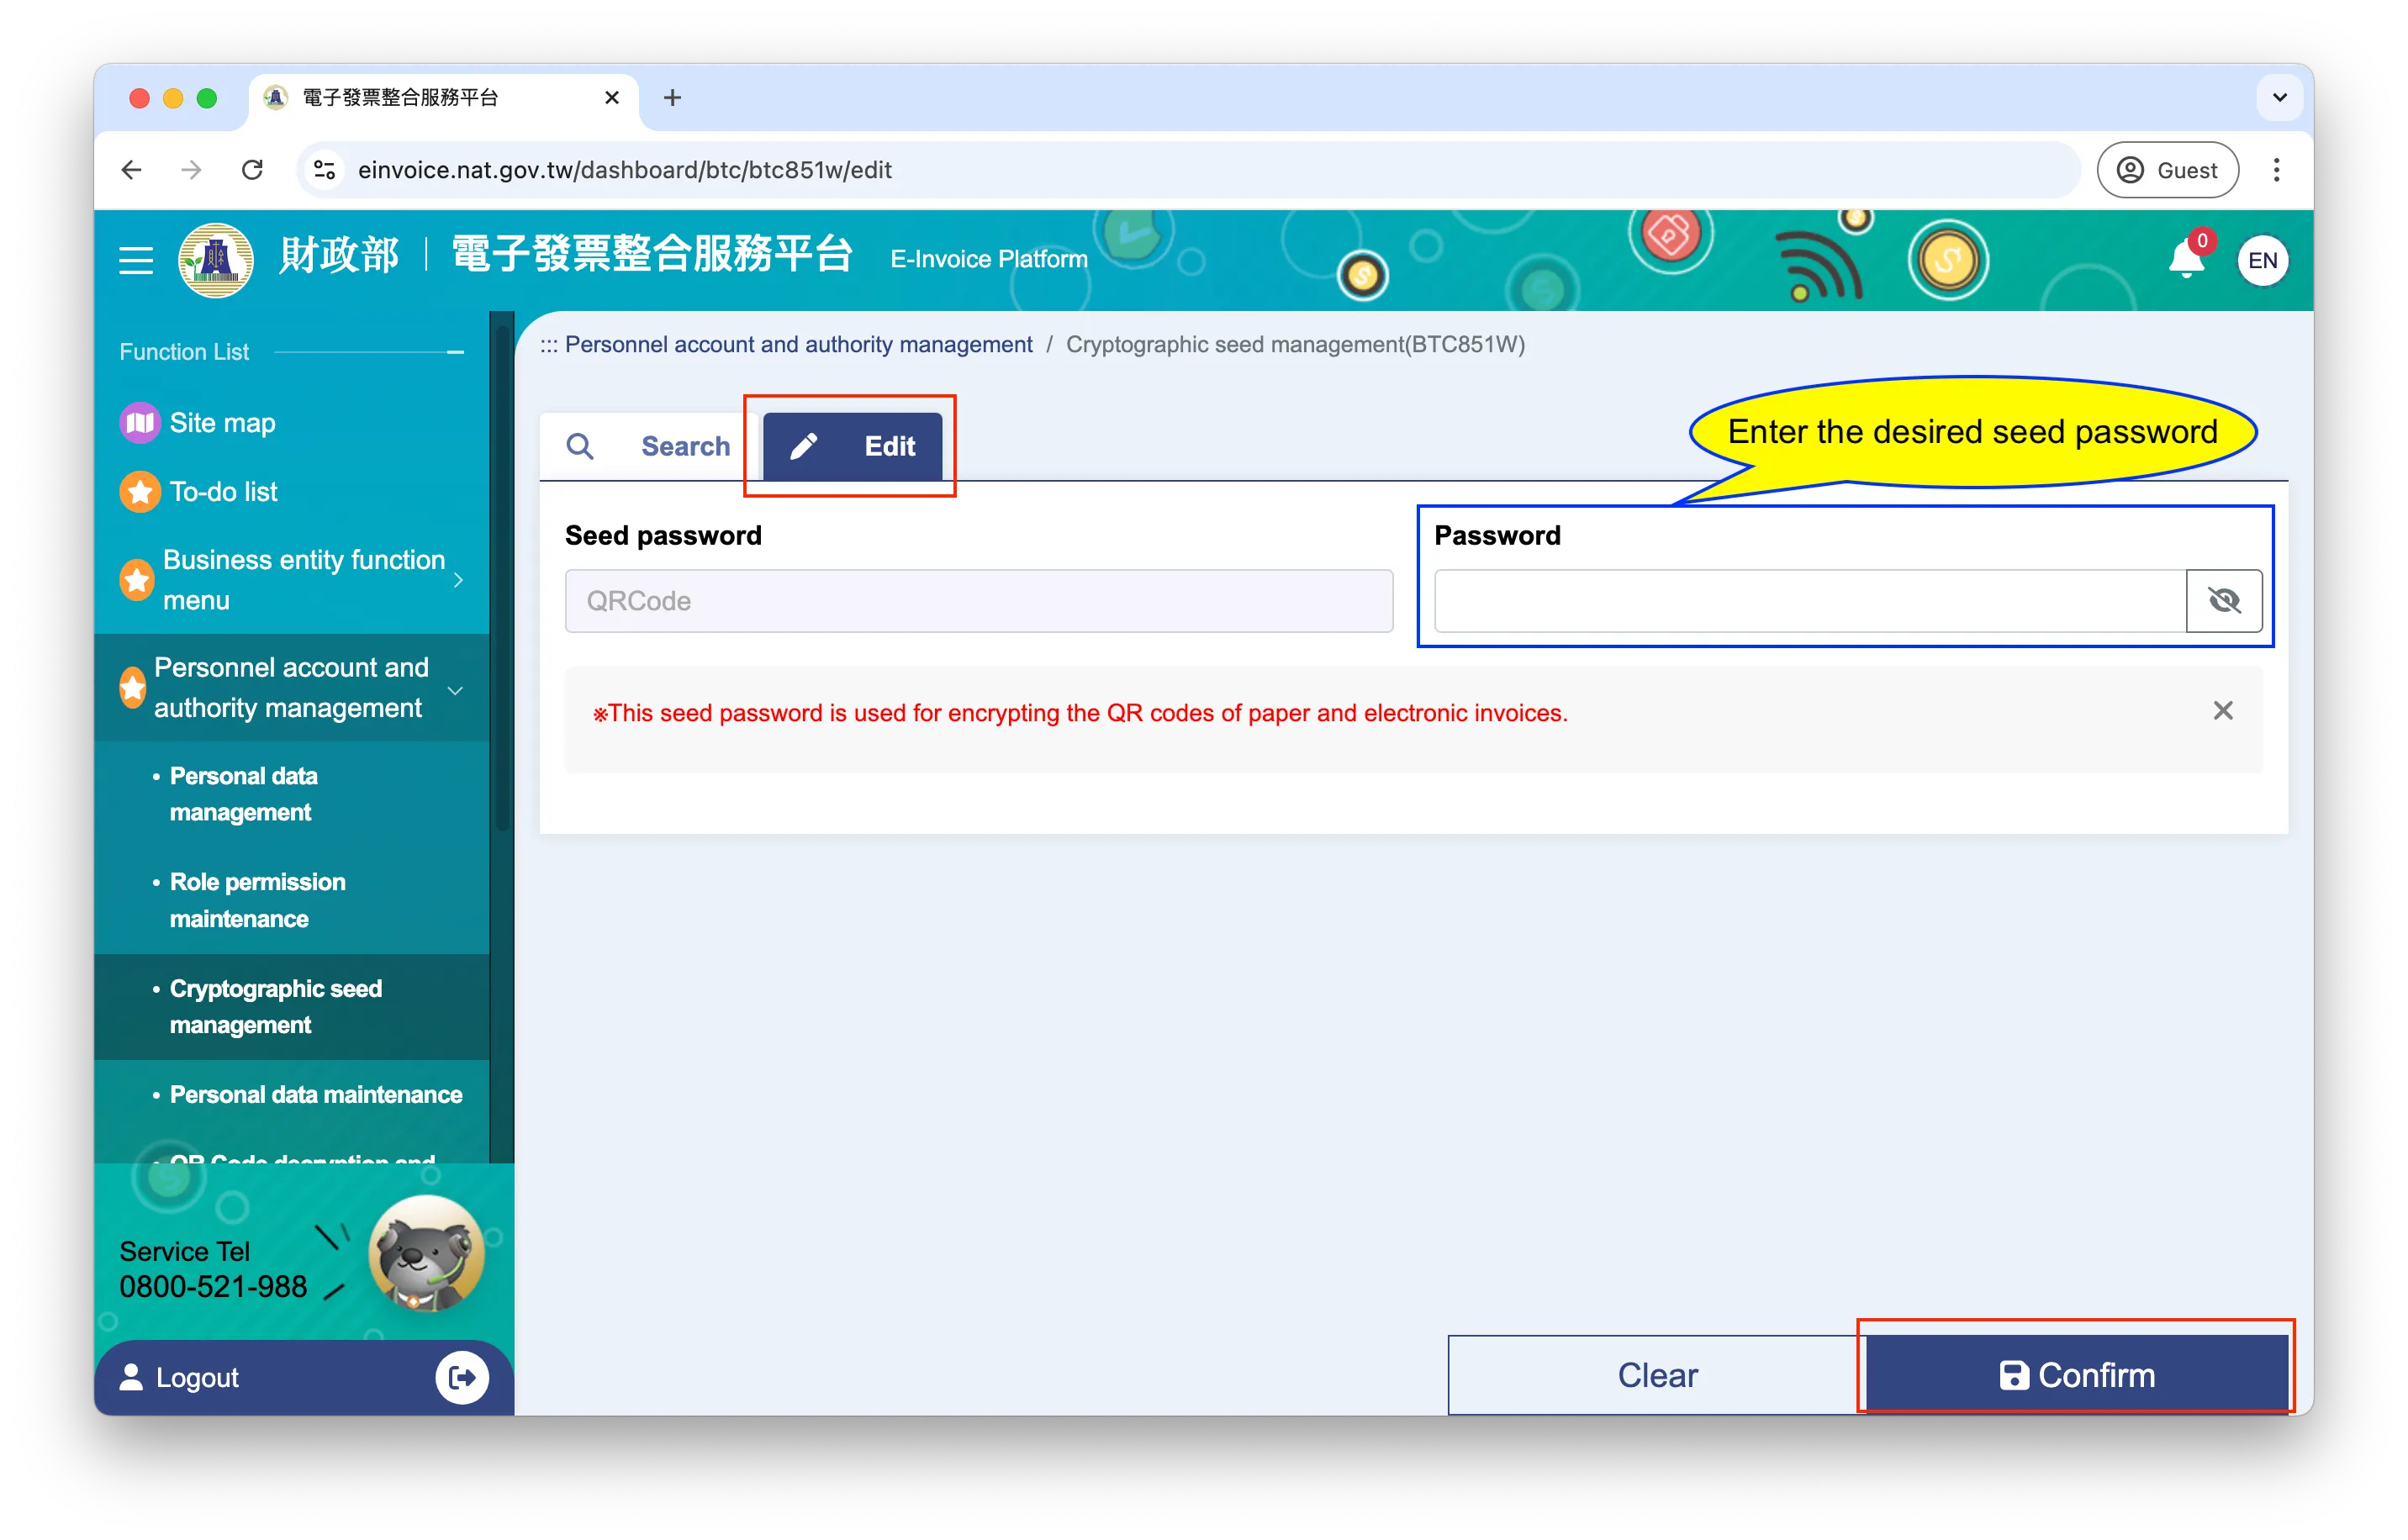
- In the Edit tab, enter the desired seed password in the Password field
- Click Confirm
-
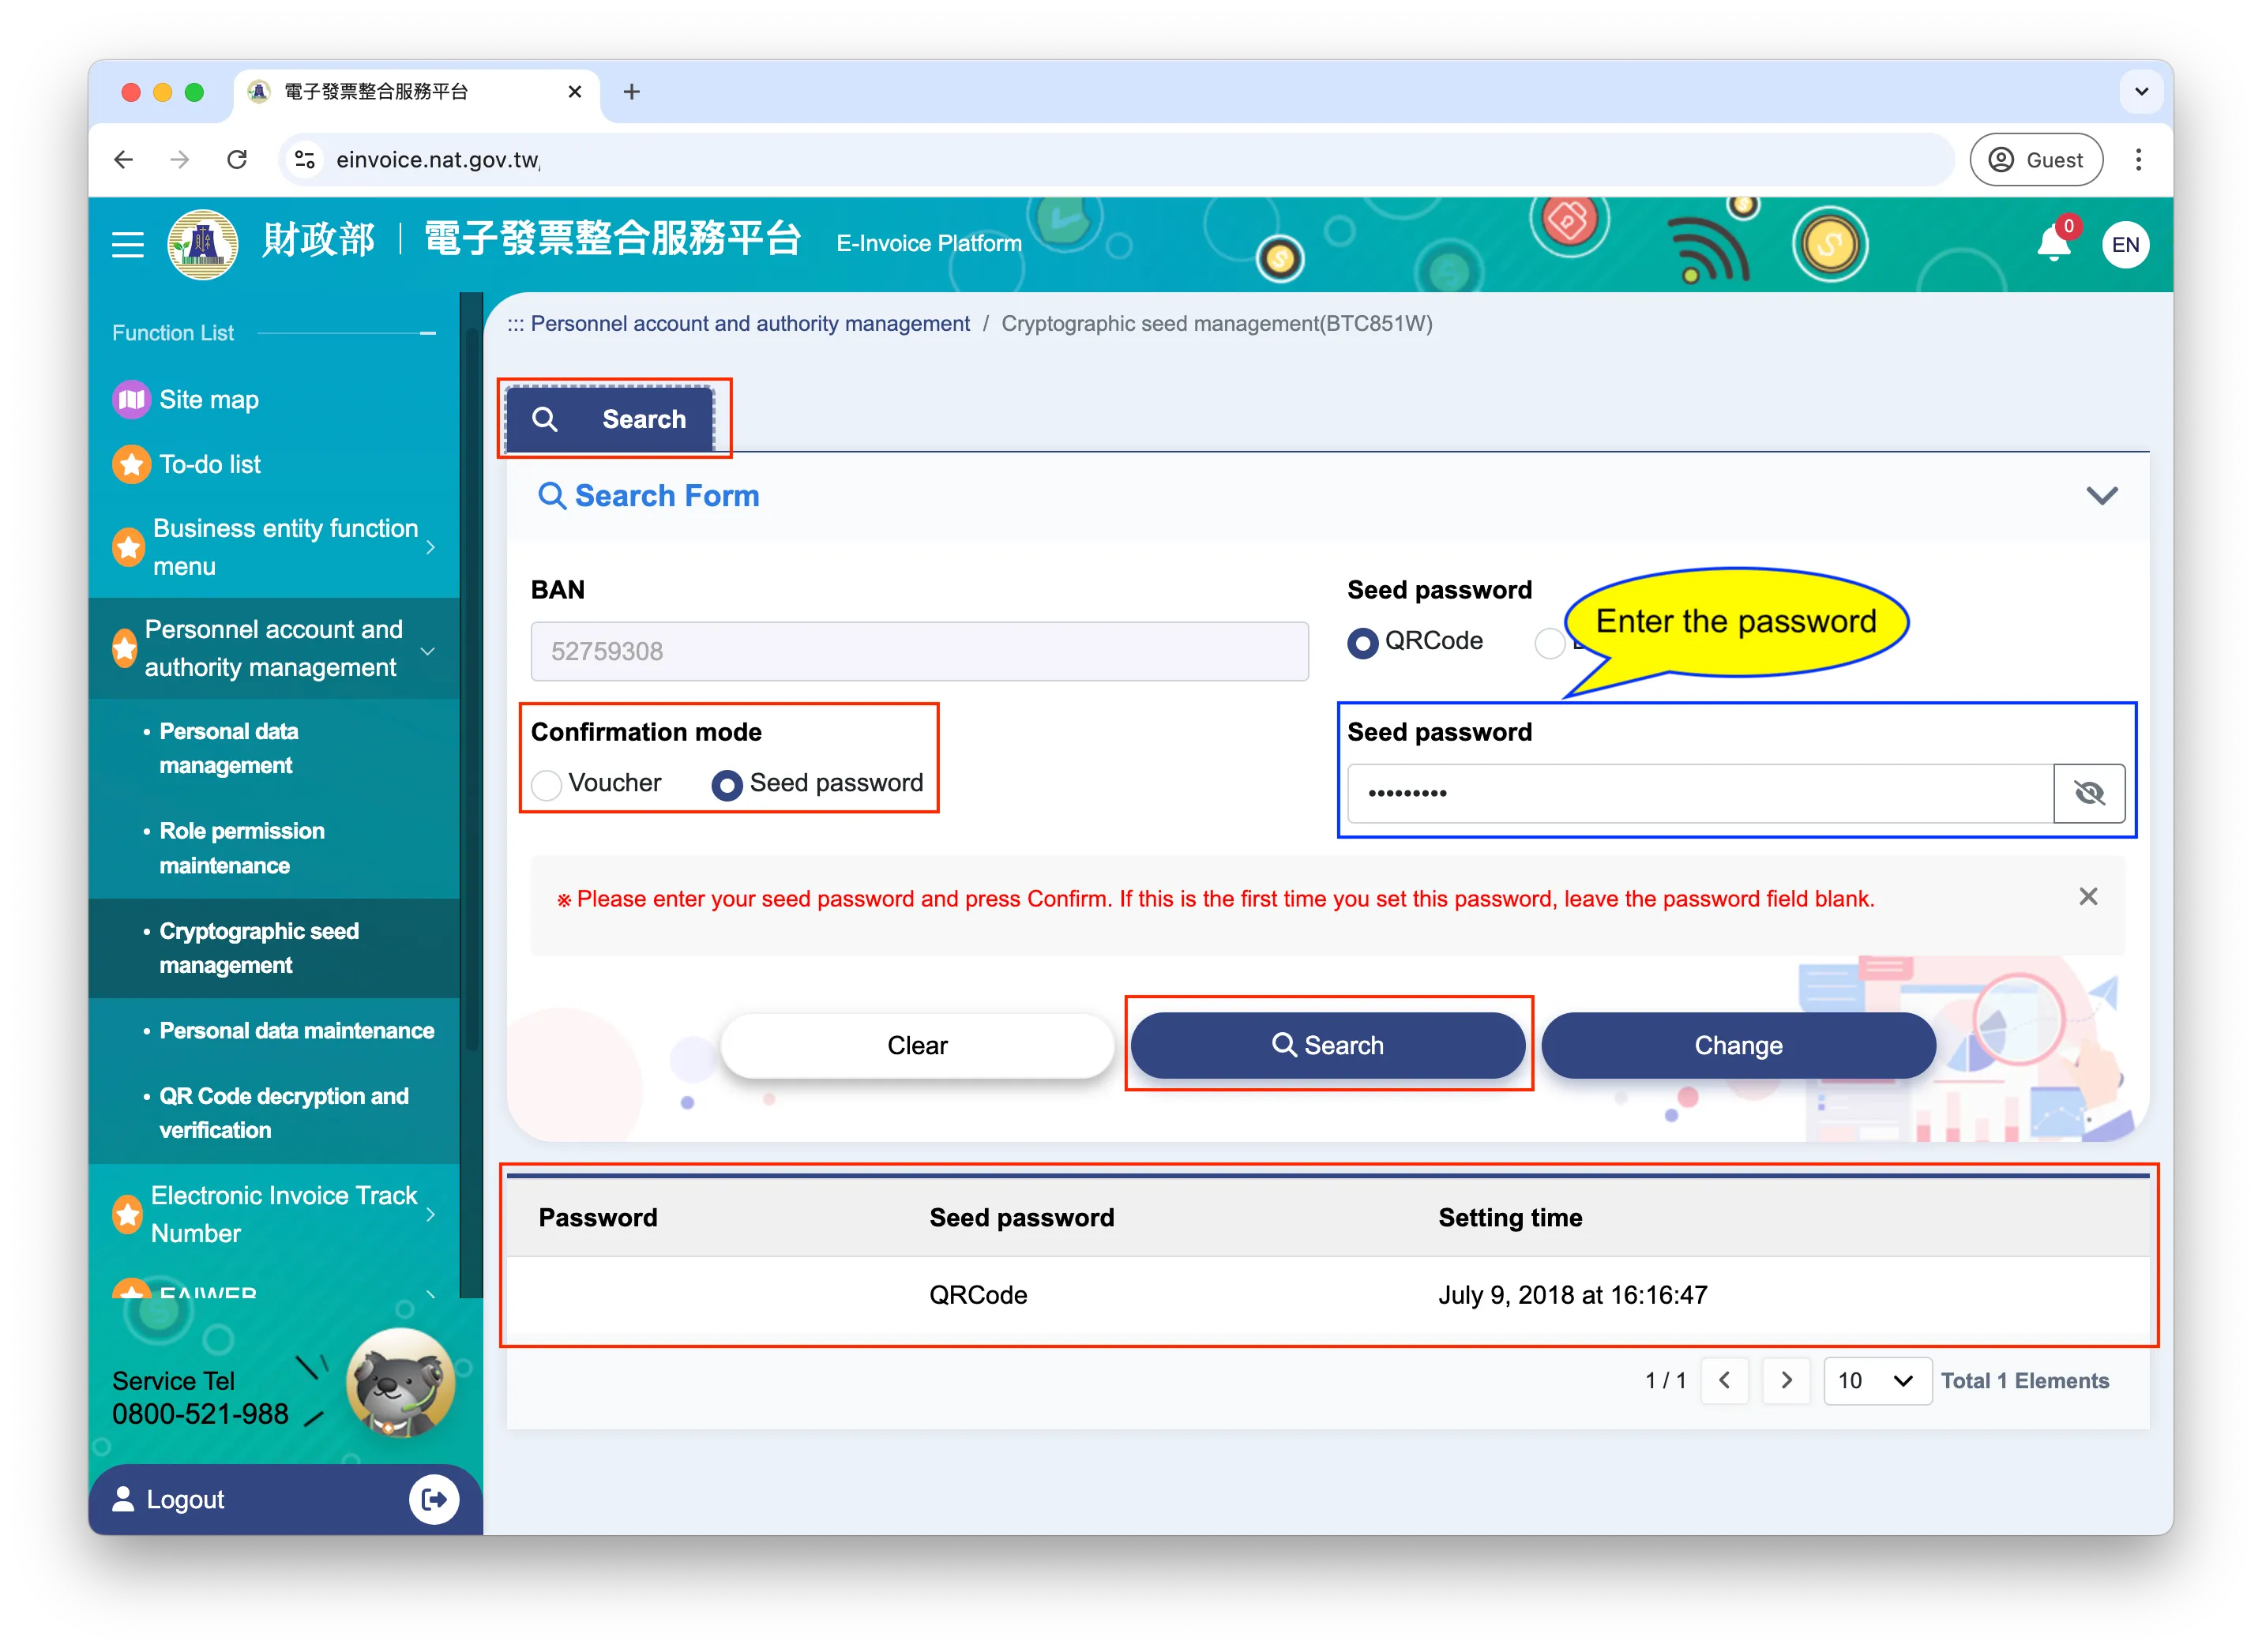
Switch back to the Search tab
- Confirmation mode: Select Seed password
- Seed password: Enter the seed password you just set
- Click Search to verify if the password is correct and take a screenshot of the result for QUEUE
Step 7: Get Ready to Start Issuing Electronic Invoices with QUEUE POS
Section titled “Step 7: Get Ready to Start Issuing Electronic Invoices with QUEUE POS”Please message our official LINE and tell us the date you want to start issuing electronic invoices. We will enable the electronic invoice function for you.
Congratulations! You’re now ready to start issuing electronic invoices with QUEUE POS.
Stamping Example
Section titled “Stamping Example”Electronic Invoice Number Application Form
Section titled “Electronic Invoice Number Application Form”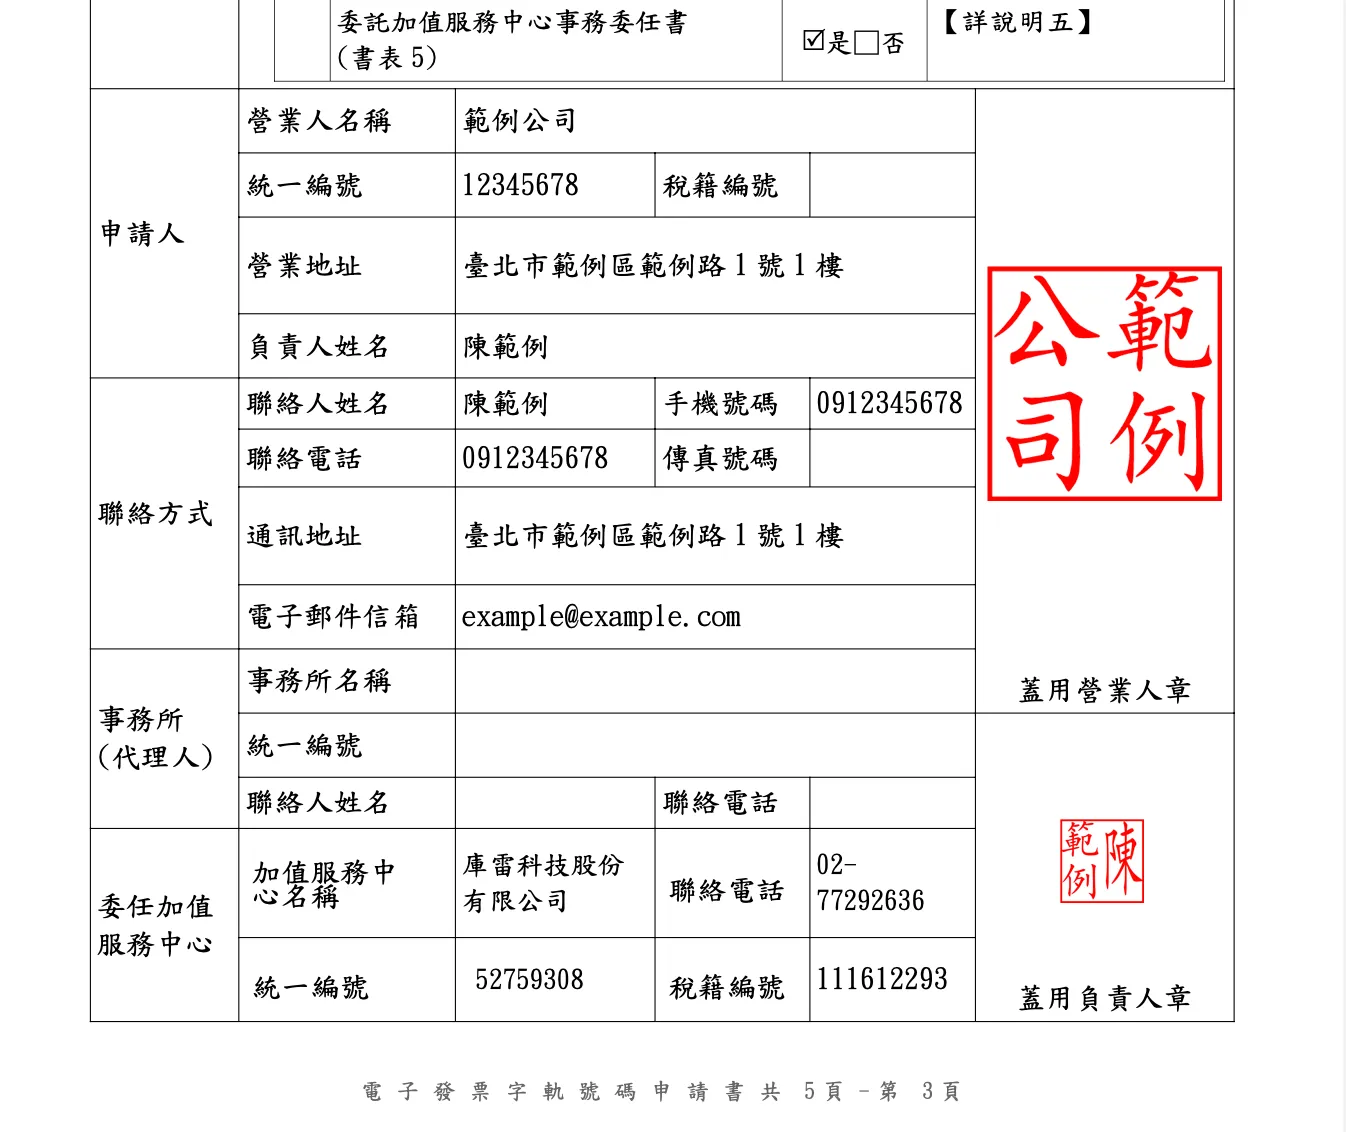
Electronic Invoice Commitment
Section titled “Electronic Invoice Commitment”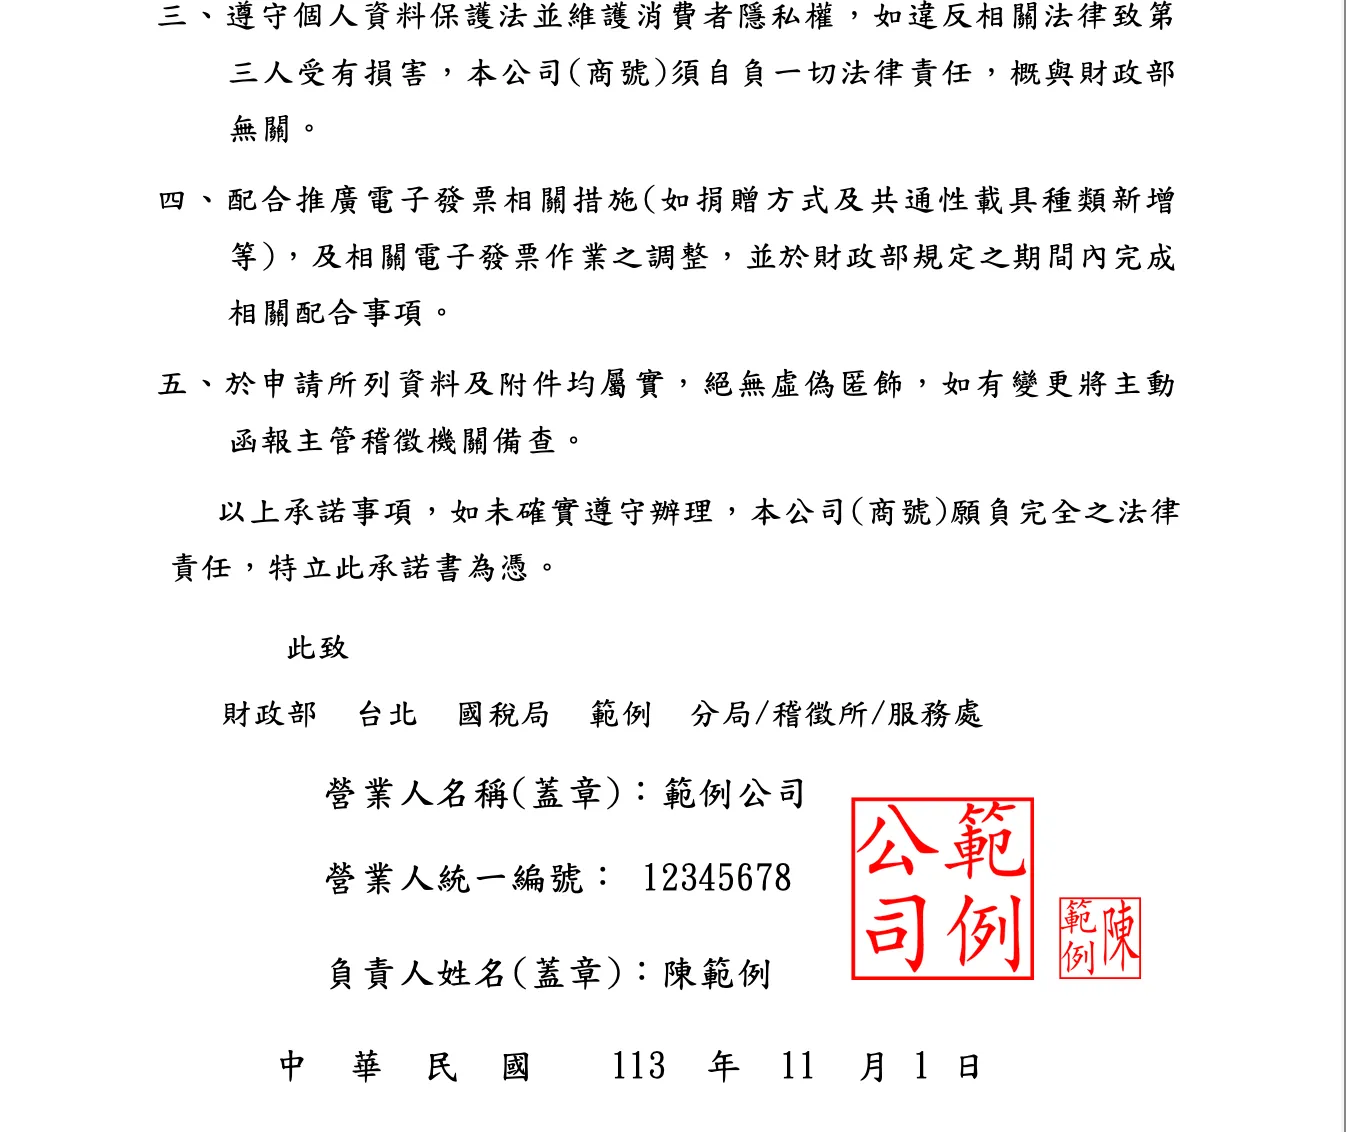
Thermal Paper Agreement
Section titled “Thermal Paper Agreement”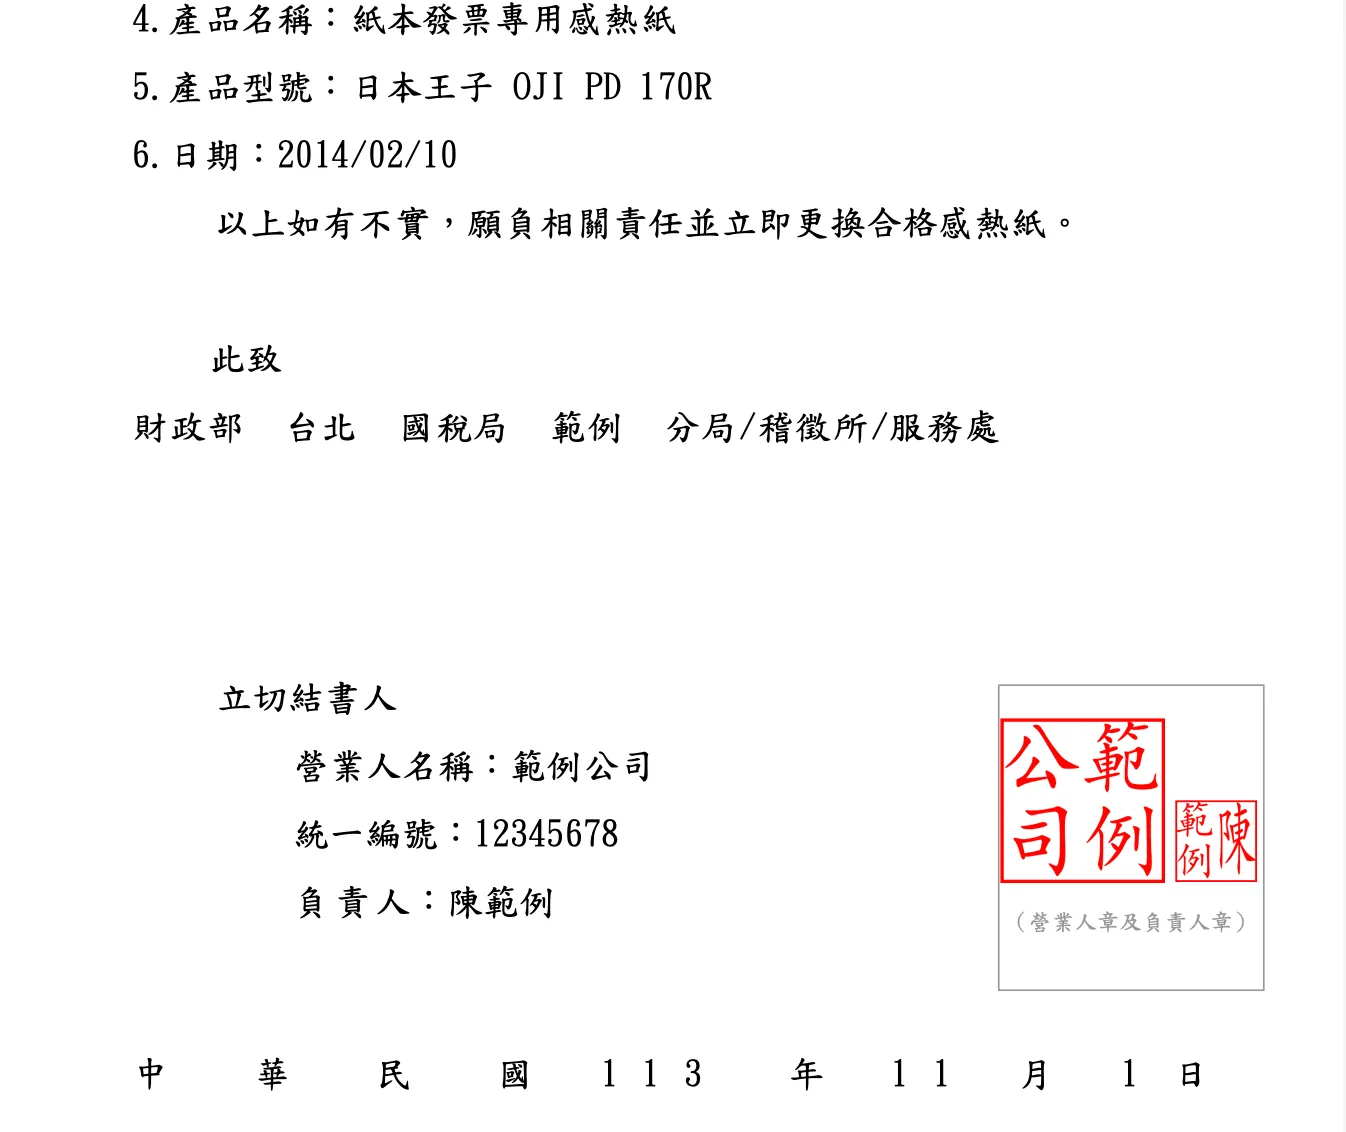
Self-Inspection Form
Section titled “Self-Inspection Form”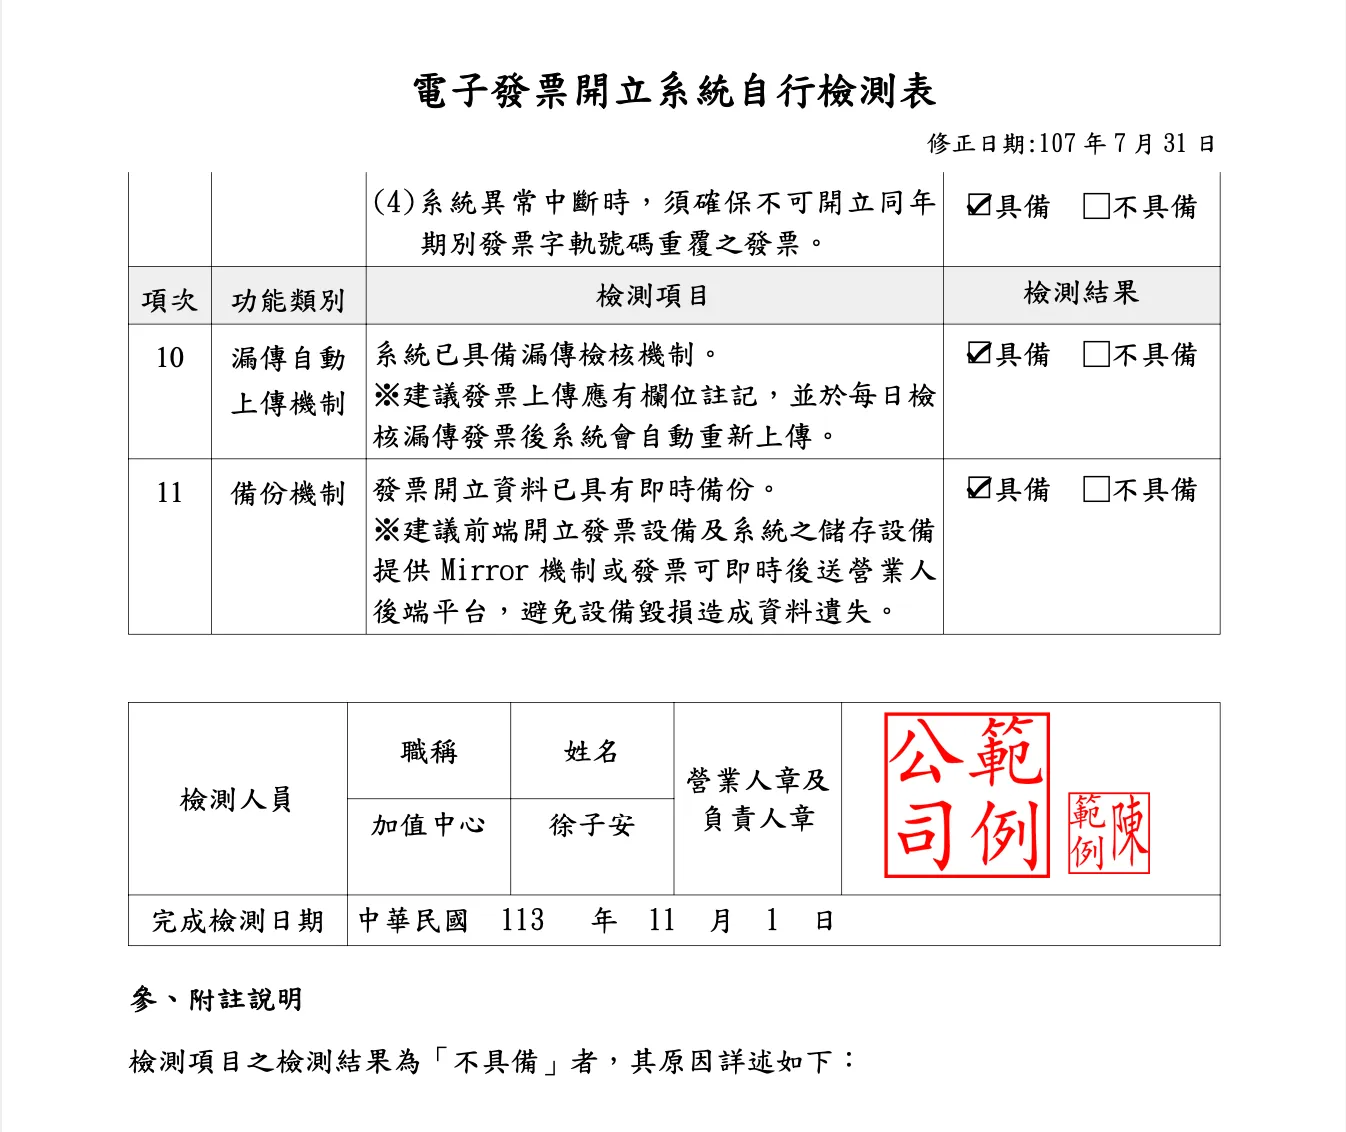
Power of Attorney
Section titled “Power of Attorney”